
It’s finally here! Took a little while, but I’m happy we finally have a chance to play RE2 Remake before its official release in just two weeks! That said — without swapping profiles, we really do only have 30 minutes with the demo, which locks you out afterward. So, to make sure anyone who wants to finish the demo and get the most out of it can, I’ve put together everything you need to know to “beat” the demo. Spoilers, obviously — read only if you need or want the help, or if you just don’t care about potential RE2 Remake spoilers.
Finishing the Demo
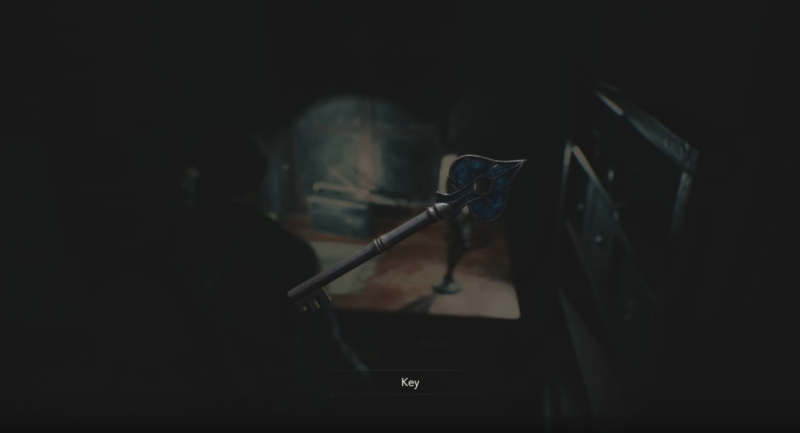
All you need to actually “finish” the demo, as in have it end before the timer runs out, is collect the Spade key and return to the front hall. The spade key is located on the third floor in the room at the top of the stairs (where the small mannequin statue is, on the desk). This shouldn’t be hard to find, it’s just laying out in the open — but the dozen or so infected between here and there will make the journey difficult. Pick up the spade key and either open the door in the Library proper on the second floor or the door in the west office, and return to the front hall. A short cutscene will play, and the demo will be over! Don’t worry of course, as long as you still have time in that 30 minutes, you can play as many times as you want.
Collecting the Commemorative Photo
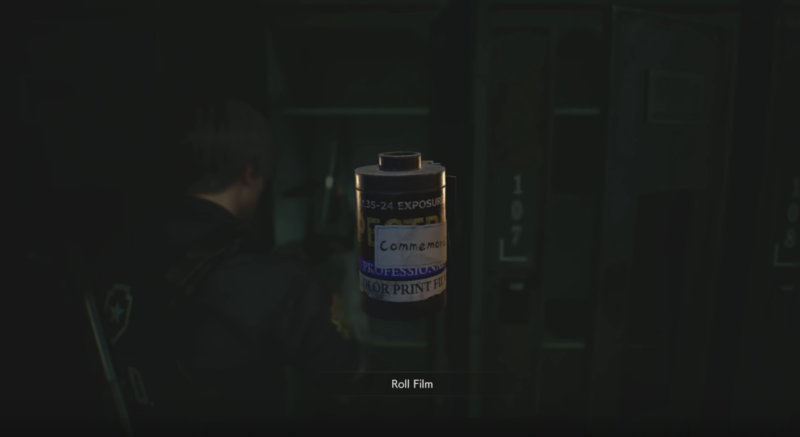
On the first floor, you’ll find the Safety Deposit Room. Inside, you’ll see a row of lockers with a numeric keypad at the end close to the door. While the keypad is missing a few keys (2 and 3 specifically), you can still open one or two of the lockers by inputting their numbers. Inputting 1-0-6 will open locker 106, which contains the “Roll Film” item. This can be taken to the Dark Room (the save room near the first floor west side stairs), and developed in the back of the small side room within. Don’t worry, lights on or lights off — it doesn’t matter. The Roll Film can be developed either way, regardless of whether you’ve hit the switch. What the developed film shows, however, is something that will have to wait until the final release.
The Medallion Puzzles
While the statue of a Lady is still watching over the RPD front hall (no longer drawing water, however), her purpose is slightly different now – and the means of unlocking that secret are too. There are now three indentations for medals to go in (as opposed to one in the original game as well as Outbreak File #2), and three more statues that house those medals throughout the station (as opposed to the original Unicorn Medal just… laying around in various places). The three statues are located on the second floor of the front hall, directly above the Lady statue, inside the Library Lounge on the second floor, and inside the West Storage room on the third. The statue in the west storage room is inaccessible for now, requiring an explosive device to blast open a welded shut gate. The other two statues are easily accessible, though.
The first stature, the one in the front hall, depicts a proud lion observing his kingdom — and is thus keeping the lion medallion inside. You can figure out the puzzle for yourself using Elliot’s Notebook, but if you don’t want to take the time out of your thirty minutes, there are three rotating dials on the front of the statue, with a number of different images on each rotation. To unlock the Lion Medallion from the statue’s grip, input the combination of Crown, Lion, Ram.
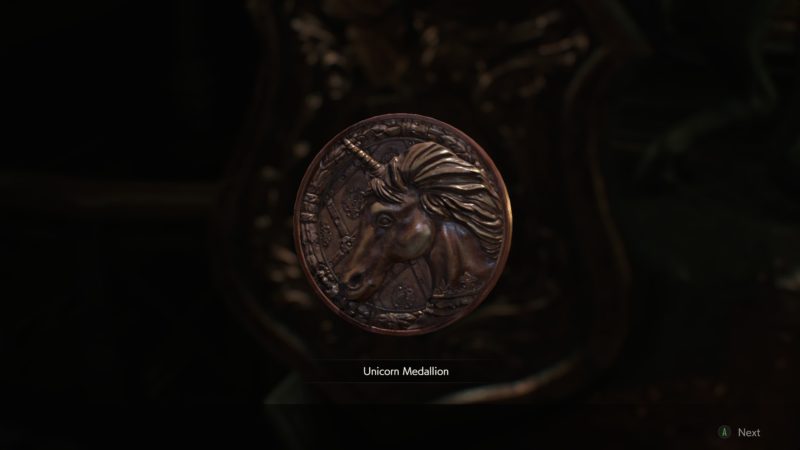
The next statue, in the Library Lounge, is of the magical beast of myth — a noble Unicorn with its head held high. Again, the puzzle can be solved by checking Elliot’s notebook, but for a quick answer, input Dove, Lady, Harp. The Unicorn Medallion will be yours for the taking.
Of course, neither of these are enough to open up the passageway beneath the Lady statue, which will have to wait until the final game.
Opening the Lockers
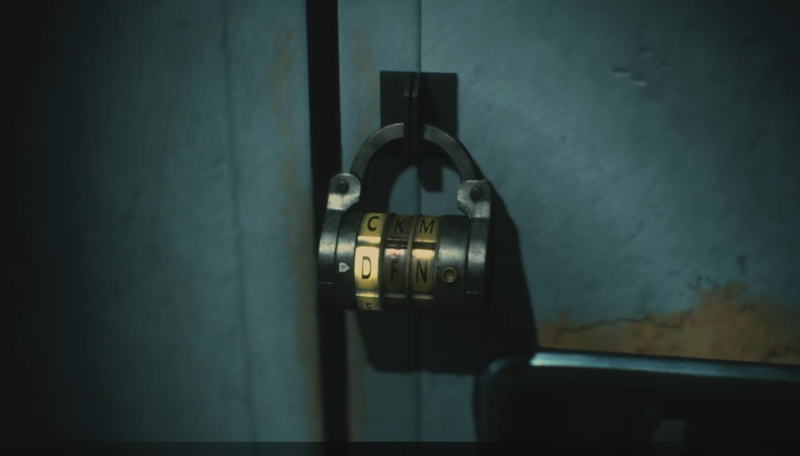
There are two lockers located on the second and third floors of the RPD station’s west side that have combination locks. Instead of numbers, they feature letter combinations. Thanks to the time hack for the demo (which removes the time limit), fans just tried every random combination possible on the two lockers and… well, the answers are quite charming. The combinations are RES (Resident Evil) for the one on the third floor, just outside of the room you get the Spade key in, and BIO (BioHazard) for the one on the second floor. There’s Shotgun ammo in one, and Magnum ammo in the other (don’t get excited, there’s no magnum in the demo).
Opening the Safe
I genuinely did not expect this to get solved in the demo, but hey PT was solved in like 4 hours so what do I know. Where’s Barry has this handy tutorial on how to open the safe in the RPD West Office.
Other Tips
That more or less covers it as far as puzzles go for the demo — but there is of course still a lot to discover about RE2 Remake, such as the zombies roaming its halls. It’s important to keep an eye out for Shotgun shells, as after picking it up (in the first floor Saftey Deposit Room, using the Key Card found in the Operations Room), there’s only four more shells available in the demo. They can be located in a locker in the Shower Room on the second floor. Handgun ammo, however, is plentiful, and you can create more by combining two Gunpowders, so keep your eyes peeled. By inputting the code 1-0-9 into the Safety Deposit Room’s keypad, you can get a few handgun bullets out of one of the lockers as well.
While you get a combat knife from Marvin after clearing the east side area at the start of the demo, you can find a second knife (as they degrade with each time you use it as a defense weapon to get out of harm) near a police officer corpse in the library on the second floor. So that’s handy.
When fighting zombies, it’s important to always keep in mind how they work now. Much like the Molded of Resident Evil 7, these infected can have each of their limbs damaged or blown off entirely, maximizing your effectiveness. Headshots aren’t always a guaranteed kill unless you manage to completely destroy everything from the jaw up. As I said in my gameplay video: unless their heads “look like an open flower,” odds are pretty good they can still get up. A handgun can do this, but it’ll take quite a few shots — although there is a random chance of getting a critical hit it seems. Corpses littered throughout the RPD have a chance of coming back to life if a stray shot hits them as well, so be careful.
You can also do one of my favorite tricks from the days of old-school RE2: a well-placed shot to a zombie’s gut will split them in half, although that means the top half will still come crawling after you. It’s nice to see this is still possible with the new progressive gore system.
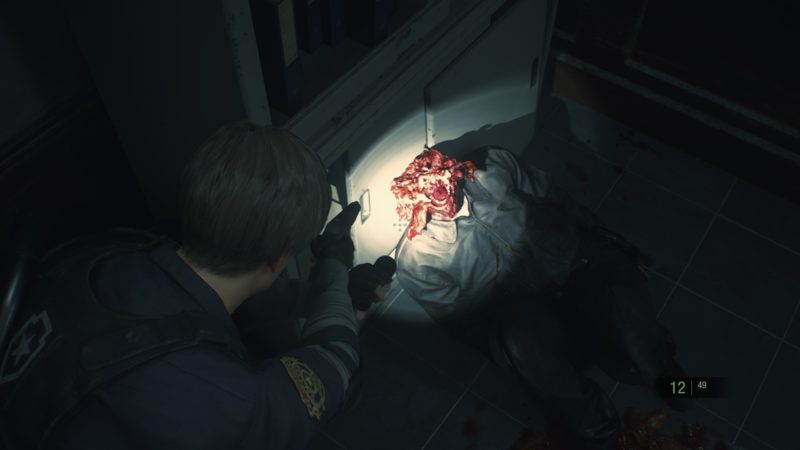
You can also board up the windows in a few places, most notably the window at the bottom of the western stairs where you’re given sort of a tutorial for it (as there are boards right there for you to use), but you can find boards in two other places as well. Right after finding poor Elliot in the Watchman’s room, you’ll find yourself in a sea of zombies. As you get to the hall you came from in the first place, hang a right and look into the room that was previously boarded up — the door is now busted open. There’s a zombie inside, but just incapacitating him for a few seconds is all you need. Run in and you’ll be rewarded with a few handgun bullets and your first set of boards! The opportune moment to use them is immediately after finding the corpse with the shredded face (who is censored to a comical effect in the Japanese version). A zombie will appear at the window directly ahead of you as you walk down the hall, just before making the right to the Operations Room. If you want to fight her, be my guest — but you can use those boards you got back on the east side of the building to keep her out for good. The third and final set of boards are in the West Storage Room on the third floor –, but there isn’t much use for them. There’s an open window back where the shredded corpse is but, so far in the demo; I haven’t had a zombie try to get in through there. Maybe just keep it in mind for the final release.
Health items can be found in a few places, and by combining items there’s a total of three full heals in the demo. A First-Aid Spray can be found in the women’s bathroom in the east hallway, as well as green herbs found in the Reception room and next to the West stairs, by the boards I mentioned above. Those two green herbs can be combined with red herbs found in the Dark Room and near a locked on the second-floor hallway, across from the entrance to the Shower Room.
The only other things that can be talked about right now are minor gameplay things — for instance, you don’t have to wear your thumb out shaking off a zombie, Leon will do it automatically. You just take 25% damage every time you’re grappled (without using a defense weapon) and Leon will shake them off for you. Using a defense weapon (L1/LB/Space) will get you out of taking the hit, but your knife will remain lodged in your attacker until you put them down for good.
You can, of course, pause the timer by pausing the game (Options on PS4, Menu on XBO, Esc on PC), but things like opening the inventory do not pause the game, so be aware. Don’t open the inventory screen to go grab some Gamerade™ and Doritos® thinking you’ve paused the demo, because it will run the clock out.
That’s about all the RE2 Remake 1-Shot Demo wisdom I have to impart for now, but come back after the full game releases for our guides and strategies!


