Oh baby, does RE2 Remake look amazing. I honestly don’t think I’ve been this hyped for a game since Resident Evil 5‘s earlier trailers (regardless of how anyone feels about the final product, the lead up was great). I can’t wait to get my hands on RE2 Remake… as soon as it launches next January. That’s a pretty long wait, so I’ve been plowing through the original 1998 Resident Evil 2 in anticipation and thought maybe some of you were thinking of doing the same. To help you out, I’ve compiled everything I could think of to get the best RE2 Classic experience before the REmake releases — including some guides to get you started towards becoming a master at it and even unlocking all the hidden goodies! I hope you find it useful!
Platform
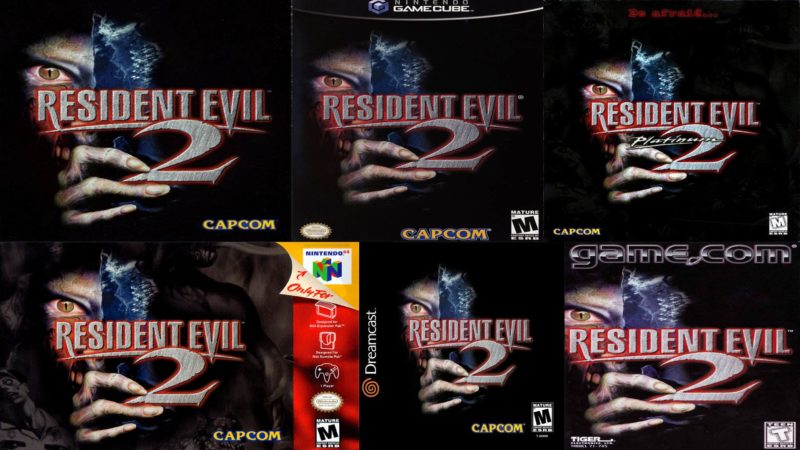
So, like most of Capcom’s library, RE2 Classic has released on just about everything you can think of. There have even been a few demakes, porting the game to systems like the GameCom, a Tiger 99x version (essentially RE2 for Tomogachi), as well as a canceled version for GameBoy Advance. We won’t be talking about those today, because this isn’t a humor editorial. No, instead, let’s look at the home console release versions and compare each for an educated decision on which is the best way to play. While I have detailed all the differences, if you’d like to see video from each version, this guy shows each being played.
Launch Version (PlayStation)
This is the original Resident Evil 2 as it launched in 1998, and was only ever available on PS1. This is probably the most bare-bones version, missing analog support, the EX Battle Mode minigame, and lacks various improvements future versions would include. It does still come with The 4th Survivor and Tofu minigames, but I’d honestly only recommend it if you have no other option.
DualShock Ver. (PlayStation/PlayStation 3)
The following year, RE2 was re-released (as Resident Evil Director’s Cut was before it) to support the PlayStation’s new “DualShock” controller, which featured analog sticks for better control (the PS originally shipped with only a D-Pad for movement input). Along with the analog support and all content from the launch version, it also included an extra mini-game, Extreme Battle Mode. This features new enemy and item placement, as well as the ability to play as Chris from the first RE. This version also introduced Arrange Game, which swapped around item placement while also giving the player access to the most powerful weapons (with infinite ammo) from the word go. This is the most easily accessible version by modern standards, as it’s available in the PS3 Store as a digital download for $9.99.
Nintendo 64
Despite the limitations of the hardware (not to mention being two PlayStation CDs crammed down into one N64 cartridge), this version managed to include all four scenarios. In the process, it lost all the other bonuses (like EX Battle and Arrange Game – replacing it with a “randomizer” mode). It does, however, add a handful of “EX” files that expanded on the story and even connects to future games (like Resident Evil 0 and Outbreak). It also is the only version that features a secret invincibility code, optional “3D” controls (as opposed to the classic “tank”) and settings for the level of violence and color of blood (cuz, you know, Nintendo). That said, this version is largely just an interesting curio, and suffers from the conversion to cartridge in a number of ways. Most notably, it has horribly compressed audio, fuzzier backgrounds, and simply awful looking cinematics. While it is neat that it exists, and is in many ways a marvel of technical ingenuity, there are too many sacrifices for the handful of exclusive files (that can easily be found and read online). I don’t really recommend it if you want anything close to a “perfect” experience with RE2.
Platinum Edition (Windows 98)
This version is probably the most difficult of all of them to work with, mostly because of how outdated it is. This Windows 98 port boasts fairly sharp character models, though they can occasionally look a little jarring in front of the grainy pre-rendered backdrops. This version has everything from the DualShock release, and also adds a gallery with concept art, CG promotional art, and even a viewable 3D model viewer. This also contains a Hard difficulty, which is brutal compared to the standard Normal mode. It’s the only version where the door loading screens can be skipped. There’s also a pretty neat gimmick to the keybinding screen, showing the character you’re playing as acting out each action in front of a mirror. Beyond those few bonuses, though, the Platinum Edition is a pain in the ass to run properly on modern hardware, with audio issues, crashing, and other weird problems. PC games age like bread.
GameCube
This is my personally preferred version. Released just after Resident Evil REmake, it boasts the best looking visuals of any home console release, as well as being the only version that has both Leon and Claire’s scenarios on one disk (discounting them both being on one cartridge for N64). This version is also the only one where you can skip the in-game cutscenes (but why would you want to?). It includes all the content from the DualShock Version but admittedly has little else to offer beyond this and using the GameCube’s wonderful controller for input (if you’ve never played an RE on GameCube, the controller’s button placement is amazingly well suited to the classic entries). The other caveat is that it was pretty rare to begin with, and today is one of the more expensive GameCube games, even if you buy it used.
DreamCast
This version is almost identical to the Windows 98 port, even containing the gallery and customization controls (as opposed to working with presets). If there was one fun exclusive feature, it’s the small HUD displayed on the VMU screen in the controller’s memory card. Few games ever really seemed to know what to do with this little screen (I still remember Spider-Man just putting a little picture of Spidey’s face and that was it), but it’s used here to display both the character’s health (Fine/Caution/Danger) as well as an ammo counter, meaning you just have to glance down to check on these things, rather than being forced to open up the menu. It’s a pretty cool little addition and makes this version feel special in its own way.
Strategies
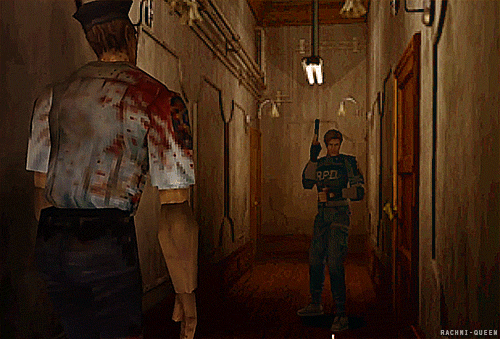
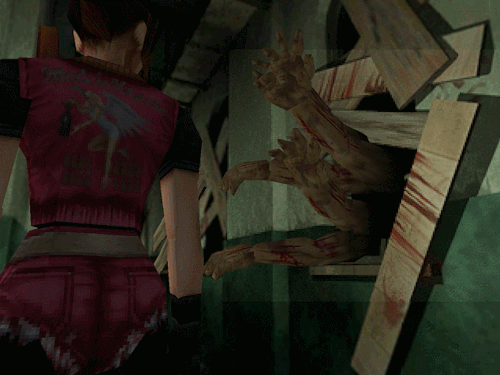
So with your preferred version picked out, let’s move on to actually playing the game. While RE was already starting to blend action into its fold by this point (pacing the slow, unnerving style of the first game to ramp up slowly to run and gun survival towards the end), RE2 is still very much a classic survival horror experience; planning carelessly will get you killed fast. Unlike RE1, Leon and Claire have comparable health and typically die in 4 or 5 hits from most enemies, and getting ganged up on by zombies (or especially Cerberus) will result in death in seconds. Enemies don’t re-spawn once put down, but that doesn’t mean that an area is necessarily permanently cleared out. Windows can be compromised on either side of the RPD building, new, more dangerous enemies can spawn in unexpected places, and there will almost always be more than 3 or 4 enemies in any given area.
Preparing yourself for a fight is a must
While your inventory is small (you have eight inventory slots, and two extra available with an expansion that can be found) you can still work with its limitations. For any given instance, keep your handgun and handgun ammo on you at all times, as well as a more powerful weapon and its ammo on backup (the Shotgun for Leon, the Grenade Launcher for Claire). This takes up four slots total, but it’s good to keep both for the variety of encounters you can run into.
The handgun is slow and doesn’t deal much damage, but it’s great for picking off individual enemies from a distance and clearing a path. Leon’s VP70 holds 18 rounds, but Claire’s only holds 13, so keep track of how many shots you’ve fired (or check the inventory often) to make sure you don’t get caught in the reload animation, which opens you up to attack. Ammo for it is more plentiful than any other weapon, so don’t worry too much about using it to take down the arrant zombie or two. While it does have the ability to stagger a zombie after about 3 or 4 shots (and an additional shot or two will knock the zombie down to the floor where you can hopefully get off enough shots to kill it before it gets back up), it is nearly useless in close quarters, and trying to fight off a horde of enemies with it is suicide. There are also larger enemies that barely even flinch when hit by the handgun, like Lickers and Ivies. This is why we have our backup weapon.
The shotgun (exclusive to Leon) holds only five rounds but packs a powerful punch. It’s capable of decapitating a zombie when aimed upwards at close range and is ideal for fighting off Lickers, as it can knock them onto their back for a few seconds giving you an opening. The shotgun has one of the slowest reload animations in the game, though, so make sure you keep track of your shots and reload manually by combining the Shotgun with its ammo in your inventory, rather than being forced into it in the middle of a fight. Be careful when fighting zombies with it, as it has the ability to literally blow them in half if you’re close enough. This sounds (and honestly looks) cool, but it ultimately means that the top half will split off and crawl towards you, potentially forcing you to take unnecessary damage as they sink their teeth into your leg.
The Grenade Launcher (exclusive to Claire) is a great, all-purpose cleaner weapon that can instantly decimate a crowd of zombies and can be loaded with ammo indefinitely (it has no ammo cap). You have access to three different types of ammo for it: “Grenade,” which splits apart into small explosions, good for crowd control), “Flame,” essential against the late game enemies, Ivies, as they’re made of plant matter, and “Acid,” which can kill a standard Licker in just one shot, and is generally extremely powerful against single enemies in general, although unreliable against a crowd.
There is also the bow-gun, another exclusive for Claire. While it does a lot of damage, firing three arrows at a time, it has a vague attack window (with arrows occasionally missing their intended target if not dead-on) and eats through ammo extremely quickly. I personally just leave this weapon alone; it’s only really useful if you run out of ammo for the handgun.
Other weapons include the Magnum, which is one of the most powerful weapons in the game killing almost everything in one or two shots with scarce ammo, the Flamethrower, a late-game Leon weapon to make up for the lack of flame-based attacks against Ivies that cannot be reloaded, the knife (put it in your item box as soon as you can and forget about it) and the Sub-Machine Gun.
The Sub-Machine Gun is extremely powerful and has a lot of ammo (displaying as a percent value rather than individual rounds), but ammo is almost non-existent and it requires two inventory slots to hold. It’s also exclusive to either Claire or Leon depending on a Zapping System decision. We’ll get to that in a bit. This is a good weapon against bosses, and I strongly recommend not wasting it against normal enemies.
On top of normal weapons, Leon also has an exclusive ability to upgrade his weapons. Weapon parts for the handgun turn it into the Matilda, a three burst automatic handgun. The shotgun turns into an uber powerful boomstick, increasing the capacity to 7 shots each capable of literally blasting apart the upper half of a zombie, and killing most enemies in one or two shots. The magnum becomes an almost comically overpowered super magnum, killing pretty much everything but bosses in one shot. These weapons parts are hidden, but finding them grants you power unlike any other weapon in the classic RE days.
Prepare to get hurt
Dishing out damage is key, but making sure you can take it right back is just as important. As said before, you generally have about 4-5 hits (give or take based on the type of enemy you’re facing, though some have instant-kill moves) before it’s game over. This is displayed in two ways, both immediately apparent in your character’s stance: holding their side when hurt, or holding their side while limping when hurt badly. You can check your inventory menu for a more descriptive (if still vague) diagnosis, showing your health as an Electro-Cardio-Gram (ECG), displaying five health stages:
FINE- 75%-100% health.
Yellow Caution- 50%-75% health.
Orange Caution- 25%-50% health
Danger- 1%-25% health (heal immediately!)
Poison– This is a status effect that slowly drains your health over time, acquired from either the Giant Spiders or Ivies. Your actual health cannot be seen on the inventory as it’s covered up by the status effect, but you’ll still get the same stance changes. While poison will not kill you outright, it will drain you down to Danger in a matter of minutes, which will get you killed extremely fast.
Like every other RE game, the primary method of healing are Herbs, which come in a variety of colors that grant different effects.
Green– Heals about 25% of your health, good for both bumping yourself up from Yellow Caution to Fine, as well as giving you at least a little breathing room when in Danger. Can be combined with another green herb for a 50% heal, and a third for a 100% heal.
Red– Does nothing on its own (a standard for this item) but can be combined with a single green herb for a 100% heal effect.
Blue– Cures poison, but doesn’t heal the player at all. Can be combined with a green herb to get the best of both worlds, or a red and green herb combo for a full-heal and poison neutralizing mixture.
It’s good to keep at the very least a green herb on you at all times, if not a green herb for minor damage and a red+green mix for major damage. Herbs are one of the most scarce consumables in the entire game, but keeping a sharp eye out and using only when absolutely necessary, you can end up with a plentiful stock by the final sections of the game.
There is of also the First Aid Spray, an item almost as ubiquitous with the series as the herbs, which will instantly heal you 100% on use. That said, they are even rarer than herbs, and using even one will instantly knock your rank down to a maximum of B rank.
Saving
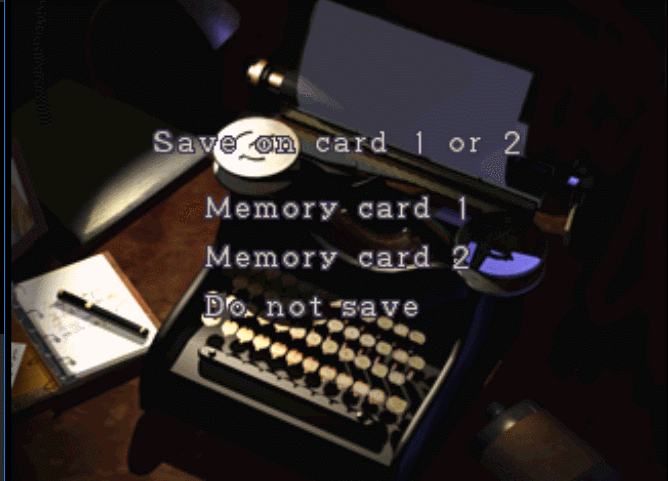
Saving, like every other element of the game, is based around resource management. Saving is limited to Ink Ribbons, a rare item typically found in sets of two in front of a typewriter, which is used to save. This means that saving itself is literally finite. There are only about 30 in one entire playthrough and about half of those are hidden outside of safe areas. You can easily run out of ink ribbons and be forced to play without saving until finding another one. RE2 (like all classic REs) has no auto-save feature of any kind, and death will reset the player back to the game’s boot up screen. Saving often but smartly is key. Don’t save after every single success or even when first finding a safe room. While you might not have to backtrack as much on death, you can quickly eat through your ink ribbons and end up being worse off for it. You also don’t want to save too infrequently, and potentially have to repeat an hour or more of gameplay.
In general, a good rule of thumb with saving is to do so once after every “major” event. The completion of a puzzle, after a boss fight, and opening up a new area for exploration. All this said, however, ink ribbons can be found in unexpected places, so keep your search button finger poised and be on the lookout for ribbons in the dark corners of the police station and beyond.
Exploration
Beyond combat, puzzles, or any other major element of a classic RE experience, exploration remains the key centerpiece that all other aspects revolve around. Exploring every nook and cranny is a must for keeping yourself well stocked, as items can be hidden in devilishly out-of-the-way places. Ammo for nearly all of your weapons, health items, ink ribbons- there’s so much to find if you look hard enough. While some items “sparkle” to indicate that there’s something small that you can pick up, this isn’t always the case. Not only can items be hidden in the darkness, or beneath other objects, they can also be found in drawers, cabinets, and behind things.
Check everything, friends. Back in the day, fans would joke that the best way to play classic RE was to walk against the wall and mash the interact button, and it still holds true today. If someplace looks like it might have something hidden there, then it probably does.
Zapping
One of the most unique features of RE2 Classic (that we already have confirmation won’t be returning for the remake) was its special “zapping” system. What this means is that when completing the game for the first time (as either Leon or Claire), you unlock a second playthrough called the “B” scenario where you play as whoever you didn’t play as the first go round. The B scenario is an entirely new story that features new puzzles, characters, bosses, and the two scenarios crossover in a number of ways, and can even help explain how certain things happen in one scenario by showing what’s going on in the other. The main draw was that the B scenario can be affected by player decisions made in the first playthrough, or the “A” scenario. While there were only a few instances of it, it was still a pretty neat feature for the time. The interactions possible are as follows:
Weapons Storage Room– This area can be unlocked after turning the RPD basement power back on and using the red keycard taken from the morgue. At the back of the room, there’s a locker that contains both a Sub-machine gun and a side pack (which expands inventory slots by two). Either or both can be equipped by the player, but choosing to do so will remove either or both entirely from the B scenario. The character in scenario A will even remark that they ought to leave the second item for the other character, but the item can still be taken. However, if the player takes the SMG, the SMG can still be accessed elsewhere in scenario B through a second Zapping interaction.
Anti-BOW Sprinkling System– This can be operated in the Umbrella lab complex at the end of the game, in the room with the gas spill and ivy tentacles exposed from the vent. It can be triggered in scenario A to make all enemies in scenario A weaker (as well as ad a green tint to the screen), but won’t be operable in scenario B and even give Ivies a poisonous attack. The system can, however, be left alone in scenario A and activated in scenario B for all the benefits and none of the drawbacks (aside from making scenario A slightly harder in terms of damage output.
Print-Locked Lab– on the opposite side of the lab from the sprinkling system, there’s a locked lab that requires two fingerprints to open. To access, (while playing the A scenario) enter the lab (the one with eggs and webbing outside of it) across from William Birkin’s on the bottom floor of the Umbrella lab complex. Inside, there will be a giant, mutated moth (don’t worry, he’s a pushover and I honestly don’t think I’ve ever once been hurt by him in 20 years of playing this game), and a computer terminal. Dispatch the maggots crawling over the keyboard first, and then use the computer, inputting the name “GUEST” when asked for a username. The character will then automatically register their fingerprints, and you’ve now begun this side interaction. You must then return to the first floor of the lab complex and use your fingerprint on the monitor outside the locked door. It will then ask for a second fingerprint.
You’re now done with this for the A scenario, but go through all these steps again in the B scenario (Moth lab, type in GUEST, run back to the locked lab and use your fingerprint) and the door will unlock. Inside you’ll find a series of grotesque failed experiments (and even the corpse of a Hunter R in the N64 version) as well as a member of the USS Mercenary team that killed Birkin. Checking his body will reward you with either the Sub-machine gun (if scenario A took it) or Sub-machine gun ammo (if scenario B took it).
Secrets and Bonus Content
Easter Eggs
There are a number of easter eggs, and while I don’t want to spoil them, I’ll give you guys hints (although y’all probably know most of these already):
Albert Wesker had many secrets and may have left some behind. You never know what you might find if you just keep checking.
Who’s controlling the cameras anyway? Could it be that Lakitu again? Take some pot shots at him with your shotgun if you think you have the right angle.
If only there was a way out of the police station… Jill uses the front gate in RE3, so why can’t you?
Unlockables and Bonus Modes
Costumes– There are three separate unlockable costumes, two Leon and one for Claire. These can be unlocked by not picking up a single item between the start of the game and arriving at the police station. Once at the station, a zombified Brad Vickers (the helicopter pilot who abandoned S.T.A.R.S. Alpha team in RE1) is found wandering around the lower alley beneath the station entrance. He’s a real pain to put down, having the highest health of any single zombie in the whole game, but once you do defeat him, check his body to find the Special Key, which unlocks a locker located in the safe room on the western side of the RPD building (the same room with the photo studio). Inside the locker, you’ll find the costumes. The Nintendo 64 version had its own exclusive costumes that aren’t seen in any other version, although they replace the costumes from other versions.
LEON– A biker outfit with a leather jacket with blue jeans and brown work boots, and a blue tank top outfit with green cargo pants, combat boots, and a blue RPD baseball cap. Both outfits give Leon the ability to hold his handgun sideways, “gangster” style, which allows him to fire it slightly faster.
LEON (N64 Exclusive)– A different biker outfit with a white t-shirt, black leather vest and baggy pants, a bandanna, sunglasses, and black leather boots. The other costume is some wishful thinking on Leon’s part: full S.T.A.R.S. riot gear, complete with a baseball cap, bulletproof vest, and blue undershirt and pants. Leon still has his special handgun stance from the original alternate costumes, but only when wearing the biker outfit. The S.T.A.R.S. outfit still has him holding his gun normally.
CLAIRE– A biker outfit with a black leather jacket with her “Let Me Live” emblem on the back and flames on the sleeves, a red tank top underneath, blue jeans, a red bandanna, and cowboy boots. To make up for not having a second costume, Claire instead gets a special handgun, a revolver that fires faster and deals more damage than any other handgun, although it only fires six shots at a time.
CLAIRE (N64 Exclusive)– What I can only describe as a purple ninja outfit, this has her in a full purple jumpsuit with loose buckles exposing skin down her chest (I can only assume this was meant to be sexy on the lego brick of a character model?). Her back swaps the “Let Me Live” logo for that of the N64 port developers, Angel Studios, who would grow up to be RockStar San Diego, the team behind the Red Dead series. Just like before, Claire gets the revolver instead of a second outfit.
Bonus Weapons-Beating the game under certain conditions rewards you with special weapons loaded with infinite ammo. However, using any of these weapons even once will automatically lock you out of an A rank. Once unlocked, they can be found inside the player’s item box.
Infinite Sub-machine Gun– Beat the game’s B scenario with at least a B rank under three hours.
Infinite Gatling Gun-Beat the game’s B scenario with at least a B rank under two and a half hours.
Infinite Rocket Launcher– Beat the game’s A scenario with at least a B rank under two and a half hours.
The 4th Survivor– Unlock this minigame by completing either scenario with an A rank, which means you must complete a scenario in under 2 hours and 30 minutes, and never use a first aid spray even once. This can be unlocked in every home version of the game.
This mission sees us play as Umbrella mercenary HUNK (a charming mistranslation of ‘Hank’ that’s stuck and has since become canon) as he attempts to escape from the sewers and through the police station to the helipad. HUNK cannot pick up any items and the path to the helipad is swarming with massive waves of enemies, including some of the largest crowds of zombies in the entire game. HUNK does pack some heat, carrying a handgun, shotgun, and a magnum, but has limited ammo and only two green and blue herb mixes. I highly recommend entering each new area with the shotgun equipped, and the aim button held down so that you’ll instantly snap to whatever enemy is closest. This can be handy for getting the first hit in on a crowd, but use your head once you see whatever is actually in the room. You might want to swap to the magnum, or even just try to outmaneuver the enemies altogether. The camera actively fights you in this mode, hiding enemy placement out of sight until the last second, so be on your toes.
The Tofu Survivor– Unlock this minigame by completing both the A and B scenarios, one after another, until you’ve played for a total of six scenarios, each getting an A rank. This can be unlocked in every home version of the game.
Essentially the same structure and goals as The 4th Survivor, this joke mode has us playing as a giant brick of uncooked tofu, equipped with only a knife, two green herbs, and a blue herb. It is the hardest single challenge in the entire game. Beating Tofu essentially means conquering the original Resident Evil 2, and establishing yourself as a survival horror master… or that you have a lot of patience and brute forced it because this is honestly an extremely frustrating mode and can be infuriating to complete.
Extreme Battle– This mode is unlocked after completing both the A and B scenario on Normal difficulty. It can only be unlocked in the DualShock, PC, GameCube, and Dreamcast versions of the game.
This is actually a sequel to a mini-game in the Sega Saturn port of Resident Evil 1, and sees the player fight their way through a remixed version of the game. Starting all the way at the furthest save point, in the labs at the end of the game, the goal is to fight your way to the police station. Once reaching the police station, the player must then collect 4 “anti-virus bombs” to complete the minigame. By default, you can play as either Leon or Claire, although Ada can be unlocked after beating it on the “level 1” difficulty, and Chris Redfield (who otherwise doesn’t appear in the game at all) can be unlocked after completing the “level 2” difficulty. There are three difficulty levels in all, each increasing the amount of damage enemies deal, randomizing the location of the 4 bombs more, and even throwing the mutated monster G in its 4th malformation in some areas on the hardest difficulty. Because of how long this mode is, we can actually save at typewriters, although the number of ink ribbons available decreases sharply with each difficulty level (5 for level 1 and 1 for level 3).
Each character features their own load-out with character specific weapons and items, and all have ink ribbons (difficulty denotes how many):
LEON– Handgun, Shotgun, First Aid Spray, and a Blue Herb
CLAIRE– Grenade Launcher, Flame Rounds, Acid Rounds, First Aid Spray, and a Blue Herb
ADA– Revolver (the same one Claire gets instead of a second costume), Sub-machine Gun, Bow Gun, and a mixed herb.
CHRIS– S.T.A.R.S. Samurai Edge handgun (exclusive to him, and has a random chance of one-shot decapitating a zombie), the upgraded shotgun, a Rocket Launcher, and a First Aid Spray.
Arrange Mode
This isn’t an unlockable, but simply a way to play from the start. It is, however, an extremely easy mode set at “rookie” difficulty. You have access to all the special weapons from the start (the infinite SMG, Gatling Gun, and Launcher) and enemies are significantly easier to kill regardless. Items are also more plentiful and swapped around into easier to locate spots. I do not recommend it unless you really are just outright having your ass handed to you by the main game. This is not the way to experience RE2. This is the way to kill some time while listening to a podcast.
Cheats
Now now, these are for fun only. Don’t go and ruin your first run-through of the game with these cheats… but if you really want to know how to make the game crazy easy on yourself:
Infinite Ammo– This cheat works for all modes, not just the campaign (although it has no use in The Tofu Survivor). All versions (save for the original 1998 version) have this cheat, although the input for it is different every time.
Dualshock– Enter the “Key Config” screen during gameplay, and hold R1 while tapping SQUARE 10 times. The cheat will be enabled when the white borders around the control scheme selections turn red.
GameCube– Enter the “Key Config” screen during gameplay, and hold R while tapping the Z button 10 times. The cheat will be enabled when the white borders around the control scheme selections turn red.
DreamCast– During gameplay, open the inventory screen and input UP, UP, DOWN, DOWN, LEFT, RIGHT, LEFT, RIGHT, R.
Windows– During gameplay, open the inventory screen and input UP, UP, DOWN, DOWN, LEFT, RIGHT, LEFT, RIGHT, AIM.
Nintendo 64– At the “load game” screen, input UP (4 times), RIGHT (4 times), L, R, L, R, C-RIGHT, C-LEFT. If done correctly, the game will boot back to the main menu.
Invincibility– This is a Nintendo 64 exclusive cheat. At the “load game” screen, input DOWN (4 times) LEFT (4 times) L, R, R, L, C-UP, C-DOWN. If done correctly, the game will boot back to the main menu.
Akuma Mode– This is only available in the original 1998 PS version of the game, and was never featured in any port since. Complete the game six times with only the handgun and knife with an A rank. On the seventh playthrough, when asked to input the name “GUEST” on the keyboard towards the end of the game, instead type “AKUMA”. Now, the next time you play as Leon or Claire, you will instead be playing as Akuma, the dark warrior from Street Fighter. This is a 100% real trick that Electronic Gaming Monthly broke back in the day and I love telling people about it. But make sure to just try to do it and don’t ask anyone else about it or google it.
Welp, that about does it without just straight up giving you a step-by-step guide. But I hope I’ve answered some questions, or at least helped some new or returning players out here. That’s about all there is to find from RE2 classic, but I can’t wait to see all the new and exciting changes and secrets coming to the remake. We already know that 4th and Tofu Survivors are making it in, but I hope that we can also get an expanded version of Extreme Battle, or maybe even a new Mercenaries mode (which hasn’t been featured since 2012’s RE6). There are even crazier modes that they could implement too, like REmake‘s Real Survivor mode (which un-links all the item boxes), or Invisible Enemy mode. Gah! There’s too many awesome possibilities. For now, all we can do is wait, but at least we have the original RE2 to keep us busy until then.
Resident Evil 2 releases January 25th for Xbox One, PS4, and PC.

